The Allure of Cake Popsicles: More Than Just a Treat
Cake popsicles have swiftly risen in popularity, transcending their humble origins to become a staple at parties, weddings, and casual get-togethers. But what exactly makes the cake popsicles recipe so captivating? It’s the perfect marriage of convenience, creativity, and deliciousness. Unlike traditional cake pops which can sometimes be tricky to mold and dip, the popsicle shape provides a larger, sturdier canvas, making the process more forgiving and the results often more visually stunning. This innovative approach to a classic treat ensures that everyone can enjoy a perfectly portioned slice of cake, without the need for plates or forks. The versatility of the basic cake popsicles recipe means you can adapt it to any theme, holiday, or personal preference, making each batch a unique expression of your baking prowess.

Close-up shot of hands gently dipping a cake popsicle into a bowl of melted bright pink candy melts,…
Why Choose the Cake Popsicles Recipe Over Traditional Cake Pops?
While cake pops have their charm, the cake popsicles recipe offers several distinct advantages. The rectangular or oval mold simplifies the shaping process, eliminating the need for tedious hand-rolling. This means less mess and more consistent results, especially for beginners. Furthermore, the larger surface area of a cake popsicle allows for more elaborate decorations, from intricate sprinkles to detailed drizzles and edible art. They also tend to be more substantial, offering a satisfying bite that a smaller cake pop might lack. For those looking for easy dessert ideas that truly stand out, the cake popsicles recipe is an undeniable winner.
Essential Tools and Ingredients for Your Cake Popsicles Recipe
Before you dive into creating your edible masterpieces, gathering the right tools and ingredients is paramount. Having everything at hand will make the entire cake popsicles recipe process smooth and enjoyable. This section will guide you through what you’ll need to successfully execute your cake popsicles recipe.
Must-Have Tools:
- Silicone Cake Popsicle Molds: These are non-negotiable. Look for molds that come with popsicle sticks and have a lid or a tight-fitting top to secure the sticks during freezing. Various shapes and sizes are available, so pick one that suits your aesthetic.
- Mixing Bowls: For crumbling cake and mixing with frosting.
- Spatulas: For folding and scraping.
- Baking Sheet: To hold your molds during freezing and for cooling dipped popsicles.
- Double Boiler or Microwave-Safe Bowl: For melting chocolate or candy melts.
- Deep, Narrow Glass: Ideal for dipping your cake popsicles into the melted coating.
- Parchment Paper or Wax Paper: To place dipped cake popsicles on for setting.
- Decorating Supplies: Sprinkles, edible glitter, piping bags with various tips, food coloring, etc.
Key Ingredients for the Perfect Cake Popsicles Recipe:
- Baked Cake: You can use a box mix for convenience or your favorite homemade recipe. Any flavor works—vanilla, chocolate, red velvet, lemon, etc. Day-old cake is often preferred as it crumbles more easily.
- Frosting: Canned or homemade. Cream cheese frosting, buttercream, or ganache are excellent choices. The frosting binds the cake crumbs together, so ensure it’s not too runny. Approximately 1/2 to 3/4 cup per 9×13 inch cake is a good starting point for your cake popsicles recipe.
- Candy Melts or Chocolate: High-quality candy melts (in various colors) or good melting chocolate (like Ghirardelli or Wilton) are crucial for a smooth, crack-free coating. White chocolate can be colored with oil-based food coloring.
- Popsicle Sticks: Usually come with the molds, but ensure you have enough.
- Optional Decorating Ingredients: Sprinkles, edible luster dust, nuts, shredded coconut, mini chocolate chips, etc.
Step-by-Step Guide: Crafting Your Delicious Cake Popsicles Recipe
Now for the fun part! Follow these detailed steps to bring your cake popsicles recipe to life. Precision and patience are your best friends here, especially when it comes to chilling and coating.
Step 1: Prepare Your Cake Base
Bake your cake according to package directions or your chosen recipe. Once baked, let it cool completely. This is critical. A warm cake will create a greasy, difficult-to-work-with mixture. Once cool, crumble the entire cake into a large mixing bowl. Make sure there are no large lumps; a fork or even clean hands work best for this. This crumbled cake forms the foundation of your cake popsicles recipe.
Step 2: Mix with Frosting
Add your chosen frosting to the crumbled cake, starting with about half a cup. Mix thoroughly using a spatula or your hands until the mixture comes together like a thick dough. It should be moist enough to hold its shape when pressed, but not overly sticky or greasy. If it’s too dry, add more frosting, one tablespoon at a time. This cake-and-frosting mixture is what makes the cake popsicles recipe so delightful.
Step 3: Fill the Molds
Open your silicone popsicle molds. Take a small amount of the cake mixture and press it firmly into each cavity of the mold. Make sure to fill it completely and evenly, pressing out any air pockets. Insert a popsicle stick into the designated slot, pushing it about halfway into the cake mixture to ensure it’s secure. Close the mold if it has a lid, or ensure the stick is firmly embedded. This step is vital for the structural integrity of your cake popsicles recipe.

A whimsical scene of children excitedly decorating their own cake popsicles with colorful sprinkles,…
Step 4: Chill Thoroughly
Place the filled molds onto a baking sheet and transfer them to the freezer. Chill for at least 30-60 minutes, or until the cake popsicles are firm. This firming process is non-negotiable; cold cake popsicles are much easier to dip and less likely to fall apart. Don’t rush this step in your cake popsicles recipe.
Step 5: Prepare Your Coating
While your cake popsicles are chilling, prepare your candy melts or chocolate. Melt them in a double boiler or in the microwave in 30-second intervals, stirring well after each interval, until smooth and fluid. If the coating is too thick, add a teaspoon of paramount crystals or a tiny bit of vegetable oil (not water!) to thin it out. The consistency should be like warm paint. Pour the melted coating into a deep, narrow glass or mug – this makes dipping much easier for your cake popsicles recipe.
Step 6: Dip and Decorate
Remove a few cake popsicles from the freezer at a time (keep the rest cold). Gently remove them from their molds. Dip each cake popsicle into the melted coating, ensuring it’s fully submerged. Tap off any excess coating gently against the rim of the glass. Work quickly, as the cold cake popsicle will cause the coating to set fast. Immediately add sprinkles, edible glitter, or other decorations before the coating hardens. For more intricate designs, allow the first layer to set, then drizzle with contrasting colors or use edible markers. Place the decorated cake popsicles onto parchment or wax paper to fully set.
Step 7: Final Chill and Enjoy
Once all your cake popsicles are dipped and decorated, you can place them back in the refrigerator for another 10-15 minutes to ensure the coating is completely set. Your beautiful and delicious cake popsicles are now ready to be enjoyed! This completes the ultimate cake popsicles recipe.
Advanced Techniques and Troubleshooting for Your Cake Popsicles Recipe
Even with a straightforward cake popsicles recipe, you might encounter a few hurdles. Here are some tips and advanced techniques to ensure your success.

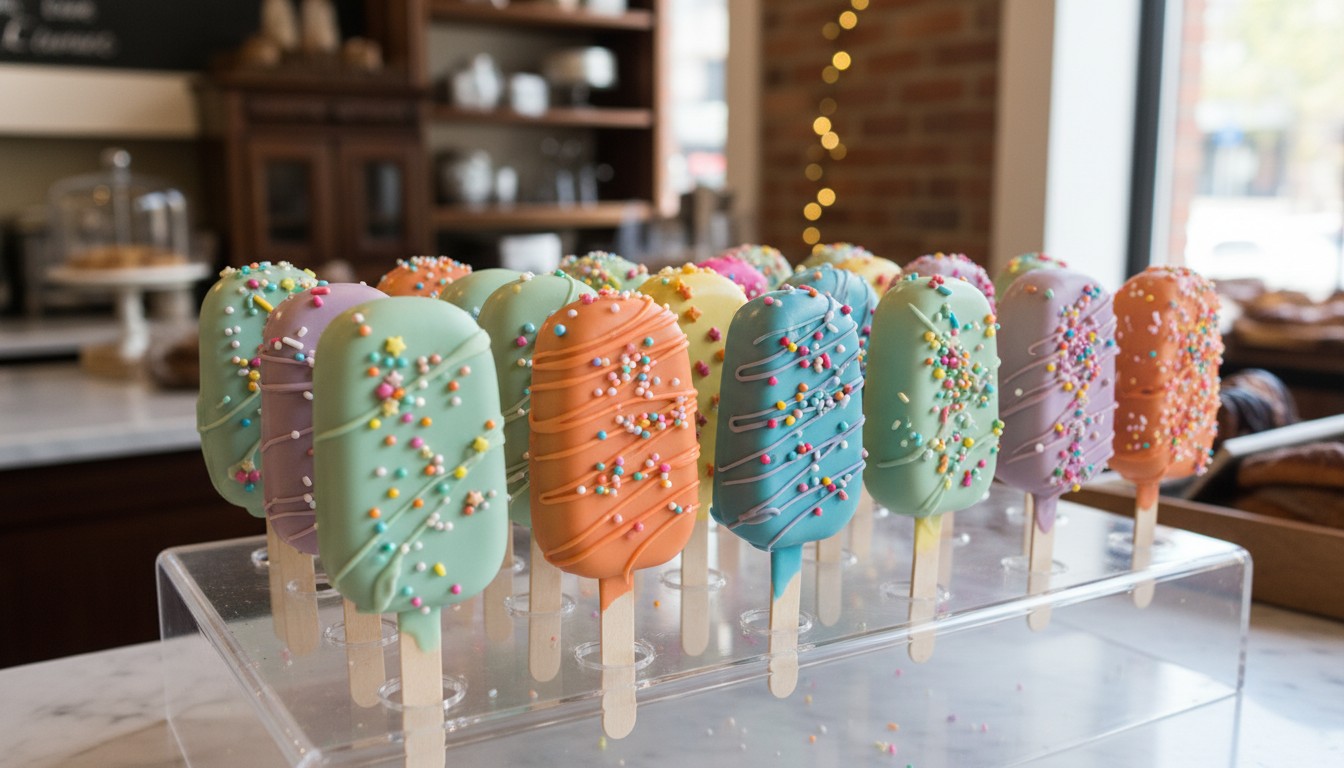
A beautifully styled dessert table featuring a centerpiece of elegant cake popsicles arranged artful…
Achieving a Smooth Coating
- *Chocolate coating* temperature is key. If it’s too hot, it will be too thin and won’t coat properly. If too cold, it will be thick and clumpy. Aim for around 90-92°F (32-33°C) for candy melts.
- Ensure your cake popsicles are very cold. The temperature difference helps the coating set quickly and smoothly.
- Tap gently to remove excess. Over-tapping can cause the coating to crack.
Preventing Cracks
Cracks usually occur if the cake popsicle is too cold and the coating is too warm, causing a sudden temperature shock. Let your cake popsicles sit out for 2-3 minutes after removing from the freezer before dipping, especially if your kitchen is warm. Also, ensure your coating is not excessively hot.
Creative Decorating Tips
- *Decorating tips* are endless! Use edible gold or silver luster dust for an elegant touch.
- Drizzle contrasting colored candy melts using a piping bag with a small hole or a Ziploc bag with the corner snipped.
- Attach edible flowers, custom edible images, or even small fondant shapes for themed events.
- Consider using a cake pop maker for different shapes if you want to experiment beyond the popsicle mold.
Flavor Variations for Your Cake Popsicles Recipe
Don’t limit yourself to one flavor! Experiment with:
- Red Velvet Cake Popsicles: Use red velvet cake with cream cheese frosting and white chocolate coating.
- Lemon Raspberry Cake Popsicles: Lemon cake, raspberry preserves mixed with vanilla frosting, and a white chocolate coating, perhaps with a pink drizzle.
- Chocolate Peanut Butter Cake Popsicles: Chocolate cake, peanut butter frosting, and milk chocolate coating.
- Cookie Dough Cake Popsicles: Vanilla cake with edible cookie dough bits mixed in, brown sugar frosting, and a dark chocolate coating.
Storing Your Cake Popsicles
Proper storage ensures your hard work lasts. Store finished cake popsicles in an airtight container in the refrigerator for up to a week. For longer storage, they can be frozen for up to a month. Thaw in the refrigerator before serving. This makes the cake popsicles recipe ideal for making ahead for parties or as gifts.
The Joy of Sharing Your Cake Popsicles Recipe Creations
There’s immense satisfaction in presenting a tray of beautifully crafted cake popsicles. They are more than just desserts; they are conversation starters, delightful surprises, and a testament to your creativity in the kitchen. Whether it’s for a birthday, a holiday, or just a weekend treat, the cake popsicles recipe is guaranteed to bring smiles. Embrace the process, have fun with the decorating, and enjoy the delicious rewards of this fantastic baking fun activity. These party treats are sure to be a hit!
Beyond the Basic: Elevating Your Cake Popsicles Recipe
Once you’ve mastered the fundamental cake popsicles recipe, the possibilities for innovation are endless. Think about incorporating layers of different cake flavors or even a contrasting filling within your cake popsicle. For instance, a thin layer of fruit jam or caramel could be piped into the center before the mold is fully closed, adding an unexpected burst of flavor and texture. You could also experiment with gluten-free or vegan cake mixes and frostings to cater to various dietary needs, making your cake popsicles recipe inclusive for everyone. Consider using natural food colorings derived from fruits and vegetables for vibrant, healthier options. For a truly gourmet touch, infuse your melted chocolate coating with extracts like peppermint, almond, or orange, or even a touch of high-quality espresso powder for a mocha-flavored shell. Remember, each adaptation to the cake popsicles recipe opens up a new world of taste and presentation. Don’t be afraid to step out of your comfort zone and transform this delightful treat into something uniquely yours. The beauty of the cake popsicles recipe lies in its adaptability and the joy it brings to both the creator and the consumer. So, grab your molds, unleash your imagination, and let your cake popsicles recipe journey be a celebration of flavor and artistry. The potential for creating memorable and delicious cake popsicles is truly limitless. This comprehensive cake popsicles recipe guide ensures you have all the tools and knowledge to succeed, whether you’re making them for a small gathering or a grand celebration. Enjoy the process of bringing your unique cake popsicles recipe to life!

An overhead flat lay of cake popsicle molds filled with cake mixture, with popsicle sticks neatly in…
Comparison Analysis
| Feature | Cake Popsicles Recipe | Traditional Cake Pops | Cupcakes |
|---|---|---|---|
| Ease of Molding | Easier (silicone molds) | Harder (hand-rolling) | Very Easy (cupcake liners) |
| Decoration Area | Larger, flat canvas | Smaller, spherical | Top surface only |
| Portion Control | Excellent (individual servings) | Excellent (individual servings) | Good (individual servings) |
| Mess Factor | Low (on a stick) | Low (on a stick) | Moderate (liners/frosting) |
| Versatility | High (shapes, flavors, decor) | High (flavors, decor) | High (flavors, decor) |
| Time Commitment | Moderate | Moderate (more molding time) | Moderate |
+Pros
- Easy to make with silicone molds, simplifying the shaping process compared to traditional cake pops.
- Offers a larger surface area for creative and elaborate decorations, making each cake popsicle a visual delight.
- Less messy to eat due to the stick, making them perfect for parties and children.
- Highly customizable with various cake flavors, frosting combinations, and coating options for your cake popsicles recipe.
- Great for portion control, providing a satisfying individual serving without the need for plates or utensils.
- Can be made ahead of time and stored, ideal for event planning and reducing last-minute stress.
–Cons
- –Requires specific silicone molds, which might be an initial investment.
- –Chilling time is crucial and can extend the overall preparation duration for the cake popsicles recipe.
- –Dipping can be tricky to get a perfectly smooth, crack-free coating without practice.
- –Can be calorie-dense due to the combination of cake, frosting, and chocolate coating.
- –Requires careful handling once dipped to prevent smudges or damage to decorations.
Key Takeaways
- Cake popsicles offer a fun, less crumbly alternative to traditional cake pops, perfect for all occasions.
- The basic cake popsicles recipe involves baking cake, crumbling it, mixing with frosting, molding, freezing, and decorating.
- Customization is key: experiment with different cake flavors, frosting types, and endless decorating ideas for your cake popsicles.
- Proper chilling and a smooth chocolate coating are crucial for a professional finish on your cake popsicles.
- This cake popsicles recipe is versatile, allowing for various dietary adjustments and creative variations.
Frequently Asked Questions
What kind of cake is best for a cake popsicles recipe?
The ideal cake for a cake popsicles recipe is typically a dense, moist cake. You can use a store-bought mix (like a yellow, vanilla, or chocolate cake mix) or a homemade recipe. Day-old cake often crumbles more easily and has less moisture, making it perfect for mixing with frosting to form the cake popsicle base. Avoid very light or airy cakes, as they might not hold their shape as well.
How much frosting do I need for my cake popsicles recipe?
The amount of frosting needed for a cake popsicles recipe can vary, but generally, for a standard 9×13 inch cake, you’ll need about 1/2 to 3/4 cup of frosting. Start with half a cup and add more gradually until the mixture is moist enough to be pressed into a ball and hold its shape without being overly sticky or greasy. The consistency is key for the perfect cake popsicles recipe.
Why are my cake popsicles cracking after I dip them?
To prevent your cake popsicles from cracking after dipping, ensure they are very cold but not frozen solid. Let them sit out for just a couple of minutes after removing them from the freezer before dipping. Also, make sure your chocolate or candy melt coating is not too hot. A sudden temperature shock between a very cold cake popsicle and very hot coating is a common cause of cracks. Thinning your coating slightly with paramount crystals or a tiny bit of vegetable oil can also help.
Can I make this cake popsicles recipe in advance?
Yes, you can absolutely make your cake popsicles recipe ahead of time! Once dipped and decorated, store them in an airtight container in the refrigerator for up to a week. For longer storage, you can freeze them for up to a month. Just make sure they are completely thawed in the refrigerator before serving to ensure the best texture and flavor. This makes the cake popsicles recipe perfect for party prep.
Can I use regular chocolate instead of candy melts for my cake popsicles recipe?
While candy melts are often recommended for their ease of use, vibrant colors, and smooth finish in a cake popsicles recipe, you can certainly use high-quality melting chocolate. If using chocolate, you might need to temper it for a truly smooth, shiny finish that doesn’t melt easily at room temperature. Alternatively, adding a small amount of paramount crystals or coconut oil can help thin regular chocolate for easier dipping in your cake popsicles recipe.
What’s the trick to getting cake popsicles out of the mold easily?
The best way to remove cake popsicles from their silicone molds is to ensure they are thoroughly chilled and firm. Gently peel back the edges of the mold from the cake mixture, and then push from the bottom of the mold. The non-stick nature of silicone, combined with the firm cake popsicle, should allow them to pop out easily without breaking. Don’t rush this step, and work with only a few at a time, keeping the rest cold.
How can I get a smooth, professional finish on my cake popsicles recipe?
For a truly professional look for your cake popsicles recipe, consider using a deep, narrow glass or mug for dipping. This allows you to fully submerge the cake popsicle in one smooth motion. After dipping, gently tap the stick against the rim of the glass to remove excess coating. Immediately apply sprinkles or other decorations while the coating is still wet. For intricate designs, allow the first layer to set, then use a piping bag with a fine tip for drizzles or details. Practice makes perfect with any cake popsicles recipe!
How can I adapt this cake popsicles recipe for dietary restrictions (e.g., gluten-free, vegan)?
To make a gluten-free cake popsicles recipe, simply substitute the regular cake mix with your favorite gluten-free cake mix. Ensure your frosting and any decorations (like sprinkles) are also certified gluten-free. For a vegan cake popsicles recipe, use a vegan cake mix (or a homemade vegan cake recipe), vegan butter or shortening for the frosting, and dairy-free chocolate or vegan candy melts for the coating. Always double-check ingredient labels to ensure they meet your dietary requirements for a successful cake popsicles recipe.
Conclusion
Embarking on the journey to master the cake popsicles recipe is a rewarding experience that blends the joy of baking with artistic expression. These charming, handheld treats are not just delicious; they are a testament to how simple ingredients can be transformed into culinary delights that captivate both the eye and the palate. From selecting the perfect cake base to the final flourish of decoration, every step of the cake popsicles recipe offers an opportunity for creativity and customization. We’ve explored the essential tools, demystified the process, and armed you with troubleshooting tips to ensure your success. Whether you’re planning a grand celebration, a casual get-together, or simply looking for a fun project with the kids, the versatility of the cake popsicles recipe makes it an ideal choice. Don’t be intimidated; with a little practice and the comprehensive guidance provided here, you’ll soon be crafting stunning cake popsicles that will leave a lasting impression. So, gather your ingredients, unleash your inner baker, and start creating your own memorable cake popsicles today! Share your unique cake popsicles recipe creations with the world and spread the joy of these delightful desserts.